As a photo freak, there are some scenarios you’ll need your photo to fit in a certain dimension. This is why you need to learn how to resize images in Photoshop. This process is pretty easy once you follow the correct steps. Why there are different ways to resize images in Photoshop, some of them will give you lower quality images than their original format.
Fortunately, you can maintain the same high-resolution quality by making use of these steps outlined below. Notwithstanding whether you want to make the image size bigger or smaller, these options will make it easier without losing any quality.
- Take a sneak peek at Xiaomi’s latest Xiaomi 12 Pro device
Table of Contents
Image Size Adjustment

This method allows you to change the resolution and dimensions of a photo to your taste. Probably you’re a photo editor and have specific dimensions you’ll like the image to be in, this method will be of great help. Maybe you intend to print out the photo, you can directly match the photo size.
Here’s how to adjust image size:
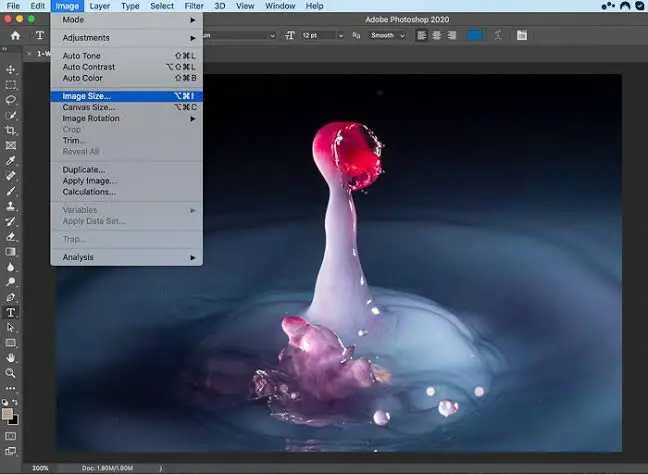
- Go to Image > Image Size
You can make the selected image bigger by going to the image, then image size. Alternatively, you can use this keyboard option to perform the task Option + Command + I (Mac) or Alt + Control + I (Windows).
Set your New Image Dimension
When it comes to the Image Size dialogue box, you’ve varieties of options to work with. The foremost setting is to check your photo’s current dimensions. You can locate this by looking at the top of the Window. To change the dimensions to your preferred taste;
- Click on the drop-down menu which is quite easier as it has a different kind of measurement.
- A width and height option will appear
- Then you can choose to adjust them to whatever image size you want
Meanwhile, you can choose to edit them and type in a new dimension depending on the purpose of the image. Sometimes, while trying to resize your photo maybe for a print, you can decide to change the dimension value to centimetres or inches. This will make it easier to get the precise scale of your image.
Change your Image Resolution
After you’ve enlarged your image’s dimensions, you might like to change the resolution as well. Changing the resolution to a higher one will add more pixels to your image which ultimately creates a higher quality and will make the photo crisper than before.
However, you can only change the image resolution through PPI (Pixels Per Inch) or PPC (Pixels Per Centimeter). Fortunately, you can use any resolution measurement you want but beware of the setting if you want to match specific image specs.
You can increase the resolution of your image by typing in a new resolution value. However, ensure the resample option is checked off and set to automatic. This will ensure the image retains its quality even if you’re increasing its dimensions.
Add the Resize Settings to the Photo
When you’re satisfied with all the settings applied to the photo, click on Ok at the bottom of the Image Size dialogue box. Sometimes Photoshop might take up to a minute to apply your changes. However, once it’s completed, your image will match the dimensions and resolution you set it at.

Conclusion
There’s no doubt Photoshop is one of the best, easiest, and fastest app to resize an image without having to sacrifice its quality.
So now you’ve known the different ways on how to resize an image without losing its quality, you can subscribe to our blog and be the first to see our latest tech guide and reviews.
How to Track a Stolen Smartphone: Steps on how to Locate your Missing Device 2022

Be the first to comment