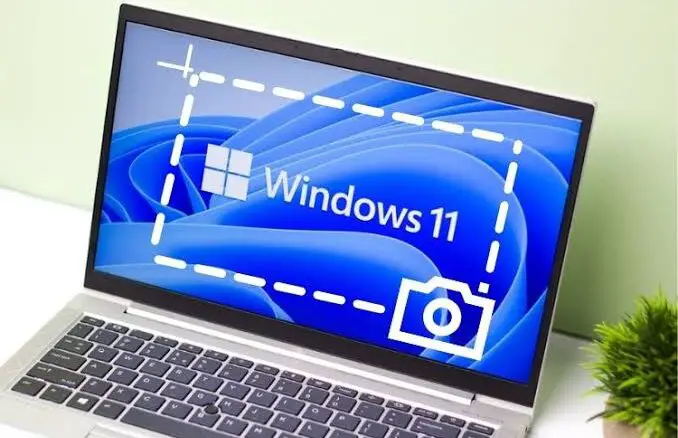
Taking screenshots is what we do countless times a day, and we’ll share with you how to take screenshots on your Windows 10 computer. As you can see, taking screenshots has become very popular amongst computer users, providing a means of sharing what you’re seeing on your screen with anybody without having them closer to you to take a look.A screenshot is the image of the current content on the screen of your computer, either a certain part of the screen or the whole. There has been no better way of capturing what’s currently on your computer’s screen than taking screenshots. And being a computer user, taking screenshots should be what you do often, especially if you use them for business.Read more…
- Best Portable Wireless Printer for Smartphones 2022 (Android and iOS)
- Best Infinix Smartphones 2022
- Best Tecno Phones 2022: Their Specs, Features, and Price
You might need to create a product manual or guide, create tutorials, or any reading content that is aimed at giving guidelines or steps for a certain task. Including on-screen images will make your work more detailed and understandable to the reader. While on the part of software reviewers like us, showing our readers how a program looks in operation is very vital.In this review, we’ll start with Windows 10 which has been updated with several new ways of taking screenshots. We’ll explain them to you so you can choose the way that seems straightforward to you. Though none of these steps is confusing, using an external snipping tool could be a long way to go for some users.But be assured that you’ll get the best quality and output of your screenshot when you use a snipping tool like Snagit. You can still stick to the Windows 10 version of the snipping tool or the newly added Snip and Sketch Utility if you just want to take a quick screenshot and share. Yet all these methods still work for one purpose, so you have to choose the one that works best for you.Related articles…
- How to Find a Printer’s IP Address
- How to Connect a Printer to your Mac
- How to transfer iPhone Photos to your PC or Mac Computer
Table of Contents
Snip and Sketch Method
This is the recently added tool for taking screenshots on Windows 10. You can access the tools in two different ways, so let’s get started.
- Open the Snip and Sketch application by typing the name in the Windows search bar.
- Click Open to be directed to the Snip and Sketch app
- Among the three options, click on the first which says “Snip now” to take the screenshot.
- Once the screenshot has been taken, you’ll be directed to a page with different snip modes like Rectangular snip, Free form snip, Windows snip, and Full-screen snip which are represented in symbols.
Another method of opening the Snip and Sketch tool is by pressing the combo Windows Key + Shift Key + S.
- After you’ve used the keyboard shortcut, the screen’s color will soften a little bit.
- Using the cursor, you can choose the section of the screen you wish to screenshot.
- Once you’ve selected your desired area, drag the cursor using the left key of the mouse and past it on the Snip and Sketch tool.
Read more: Best Free Anti-virus Software for Windows 11 2022
Using the Print Screen Key or PrtScn
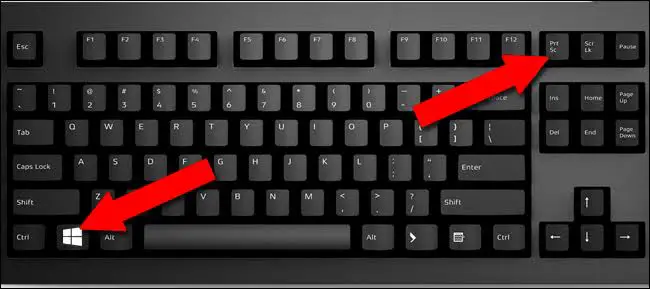
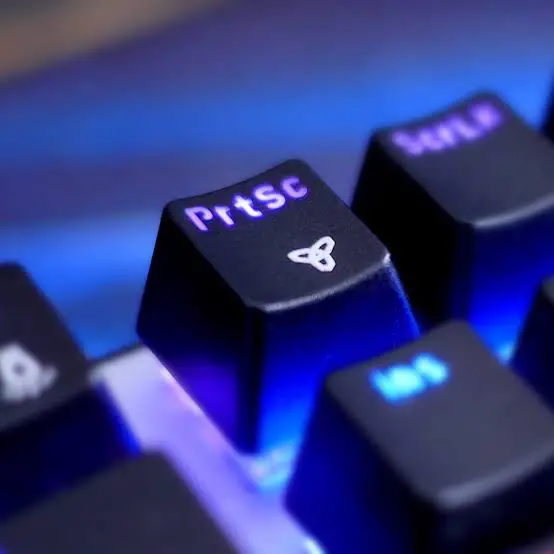
This is a commonly used method of taking screenshots on Windows 10. This is done using the PrtScn key on the top right corner of the keyboard. Depending on your choice, you can use this key alongside other keys.
- Hit the PrtScn key to copy the entire screen to the clipboard.
- To access and save the image, you have to use other apps that deal with images such as Paint 3D, Paint, Photoshop, MS Paint, or MS Word.
- Open any of the apps above and paste using Ctrl+V (make sure you are in a new document).
- You can edit your screenshot if you want to, and finally, save them to any folder of your choice.
Check out Best Free YouTube to MP3 Converter 2022
How to take Screenshots in Windows 10: Windows + PrtScn
To avoid the long process of opening an image application where you can paste from the clipboard and save your screenshots, the Window + PtrScn key is a quicker shortcut.
- Just hit the PrtScn key combined with the Windows key.
- And when you hit the two keys, the entire screen is captured and saved as an image. The image will be saved in a folder named Screenshots under the Pictures library.
Read more: Best Free MOV to MP4 Converter 2022
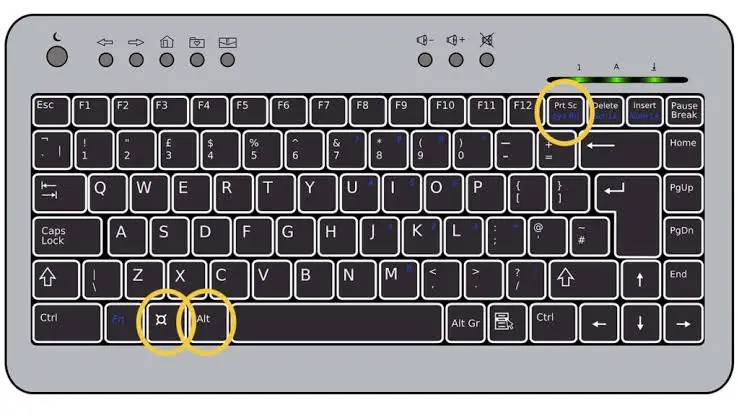
How to take Screenshots in Windows 10: Alt + PrtScn
This is another keyboard shortcut that can be used to take screenshots in Windows 10, but only the active window on the screen can be captured.
- Click Alt + PrtScn key to take a screenshot of the currently running window which is copied to the clipboard.
- To access the image and make changes before saving it as a file, you’ll also need to open an image editing app.
Read more: How to use Virtual Desktops in Windows 11
Using the Snipping Tool
Windows 10 has its snipping tool which can be used to take screenshots of any part of the current content on the screen.
- Under the Start Menu, go to All Programs, and then Accessories.
- Choose the option named Snipping Tool and open it.
- Alternatively, you can search the snipping tool via the search icon by typing Snipping Tool.
- Once the snipping tool window is open, click on New.
- Click Mode on the right corner to see a drop-down menu containing different snipping modes and click any of them depending on how you wish to take the screenshot.
- You can click the Rectangular Snip to select a rectangular section of the screen that you want to capture.
- Free From Snip will enable you to freely draw around the screen by dragging the cursor to map out a certain portion that needs to be captured.
- Using Window Snip from the options, you can screenshot any selected window on the screen.
- To capture the entire screen, you can click the Full-screen Snip.
- Using any of the options above, the captured screenshot will be copied to the Snipping tool window.
Check out Best Free Screen Recording apps 2022
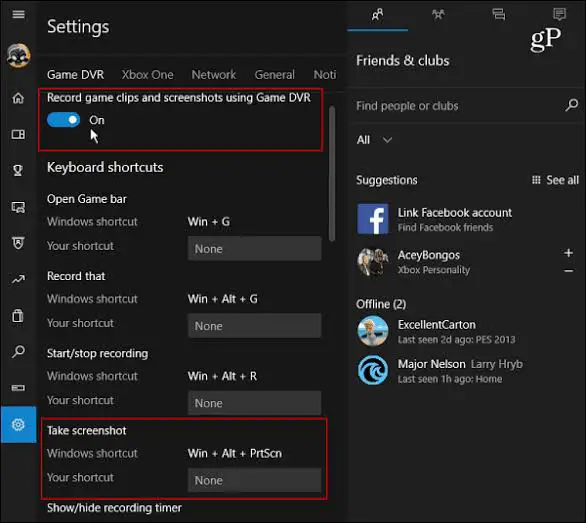
Using the Game Bar
The Game Bar is used for taking screenshots when you’re in the middle of playing a game, but you can use it to capture the entire screen even when you’re not gaming with your computer.
- Press the default keyboard shortcut – Windows Key + Alt + PrtScn to capture the whole screen.
- But before you do that, you’ll have to set up the action through Game Bar.
- Click the Windows Key + G to open the Game Bar window
- You can now click on the screenshot button from the window or use the keyboard shortcut as we stated above.
Read more: Microsoft Windows 12: Release Date, and Features
How to take Screenshots in Windows 10: Using an External Snipping Tool
If we should recommend any third-party tool for taking screenshots, Snagit is definitely the one. Aside from taking screenshots, there’s a whole lot to do with this software. You can record the screen and take scrolling window screenshots. Snagit also features some useful editing tools, and it’s compatible with both Windows and Mac. However, you can take a look at our best snipping tools.-Techcity.com.ng
Read more: Best Home and Office Printers for Windows 11 2022



Be the first to comment