No matter how careful you use your MacBook Pro, you will surely encounter some issues and the only solution left is to reset the computer. If you intend to reset your MacBook Pro maybe because it’s faulty or you want to give it away, there are some certain procedures listed here you’ll have to follow.
The issue might be a frozen screen making you unable to access any application or program while you still have a lot of work on your table. This is always frustrating to see, even after rebooting the computer countless times.
A proper reset is what you need to get your MacBook Pro up and running if it’s running slow or acting weird. On the other hand, you’ll need to reset your MacBook pro if you’re selling it so that another person won’t have an access to your documents and files. Resetting the MacBook Pro involves erasing all the information that has been stored in your Mac, and restoring everything to the way it was when you purchased it.
Though you can do a soft reset without losing all information that you saved on the computer. This involves clicking on restart under the Apple menu on the top left corner of your screen to reboot. And once the process is done, you’ll still have your data and your computer could get running right.
As we mentioned earlier that you can still see these issues even after countless times restarting the computer, that’s where factory reset comes in which keeps you at a high risk of losing all the important data you have in your MacBook Pro. Well, if you do things the right way, then you won’t lose any data on the process.
This article will teach you how to reset your MacBook Pro with all the necessary steps you need to take to secure your data after the reset. This reset will help fix bugs and speed up your MacBook Pro through a deep clean that will get rid of any file or application that’s slowing down the computer’s system.
But if you don’t back up your data, you will lose them entirely, and there’s no possibility of retrieving them back. We’ll guide you through the steps to reset or factory reset your MacBook Pro starting with backing up your data. Here’s how to do it.
Related articles…
- How to Find a Printer’s IP Address
- How to use your GoPro as a Webcam
- How to Connect a Printer to your Mac
Table of Contents
How to Back up your data

This is the first and the most crucial step you have to take before resetting your MacBook Pro. If not, you’ll end up losing your important data.
- Firstly, make a copy of all your data in the MacBook Pro
- Then back them up to an external hard drive
- Restore them to your Mac once you’re done.
Note:
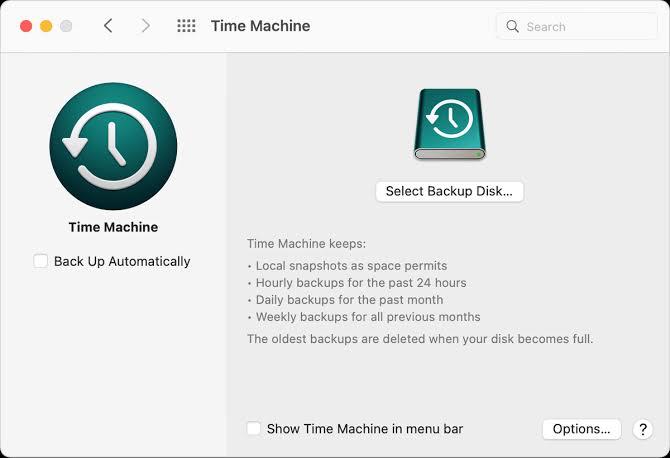
With the built-in Time Machine program, you can easily copy all the information which includes files, documents, and others to an external hard drive.
If you want to be selective by choosing only the ones you want to store, the Time Machine program with other backup programs will make it easy for you.
Sign out of your accounts
A factory reset is a bit difficult because there’re extra steps to take before and after the reset. After you’ve backed up your device, the next action you should take is to sign out of your accounts. Such accounts might be iTunes, iMessage, and iCloud, so make sure you sign out to those accounts and other ones that are in use.
Also, you’ll need to sign out from apps like TV, Music, and Books one after the other, though it is done using iTunes some years ago. In case you don’t know how to do these, we’ll show you how.
- Open any of the apps and go to Account > Authorization and then Deauthorize This Computer
- Enter your Apple ID and password then click the “Deauthorize” button.
To sign out of iCloud
- You’ll need to turn off Find My Mac from System Preferences then click on Apple ID
- Select iCloud that’s on the top left panel, then uncheck the Find My Mac
- Lastly, click Overview to see the sign-out button for iCloud.
To Sign out of iMessage
- Signing out of iMessage is very easy. Just click Messages from the Messages app and select Preferences
- Then open the iMessage tab and click sign out.
Read more: Microsoft Windows 12: Release Date, and Features

Reset your MacBook Pro
You’ll see an Apple menu on the top left corner of your screen.
- Open the folder and select restart.
- As the restart process is going on by showing a black screen with the Apple logo, press and hold the command button with R at the same time on the keypad.
- You’ll be redirected to the Disk Utility window where you can erase the entire information that was stored on your MacBook Pro.
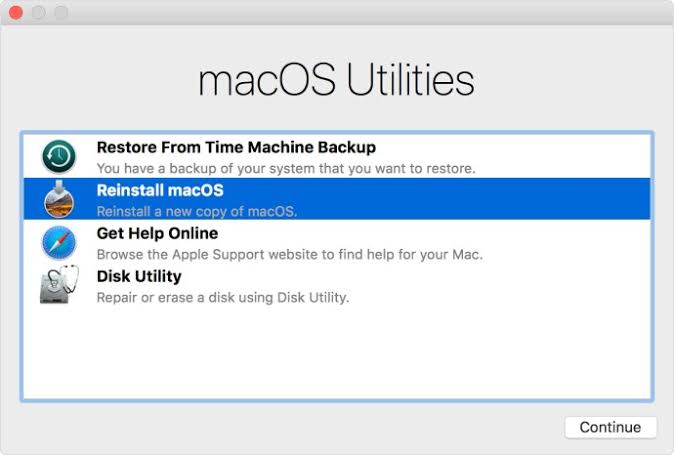
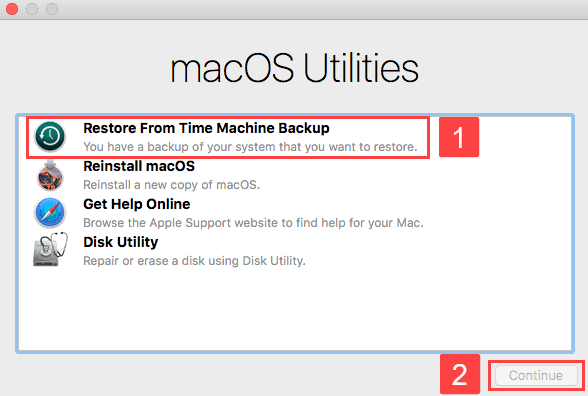
- At first, you’ll be shown many options like Restore From Time Machine Backup, Reinstall macOS, Get Help Online, and Disk Utility.
- Then click the Disk Utility option and select continue.
- From the options available, choose your hard drive (depending on the name you used to save it if you’ve renamed it) and click Erase.
Once you’re done erasing all the information on your computer, you’ll have to reinstall the operating system.
- Go back to the Disk Utility window and you’ll see the same options as we mentioned above.
If you couldn’t find your way back to the Disk Utility window, restart the computer once again and hold the command-R button. Then click on Reinstall macOS from the options available and follow the instructions to reinstall your operating system. After that, you’ll be directed to the Setup Assistant showing that your MacBook Pro has begun a fresh start, but you can restart your computer to restore your data.

How to Reset your MacBook Pro: Restore Your Data
Once you’re done with the factory reset, the next step is to restore your data to your MacBook Pro. This can be done by using the following steps.
- Plug in the external hard drive you used to back up your data in the MacBook Pro.
- Once the external hard drive is connected to your computer open the Finder.
- Click Applications, then select Utilities > Migration Assistant, and then click Continue.
A window will show up on the screen with different sources from which you can restore your data. Choose the option that says Time Machine Backup and click continue.
Your data will be restored to your MacBook Pro without losing the one once they’re already backed up to the external hard drive.


Be the first to comment